- 1
Pick the day
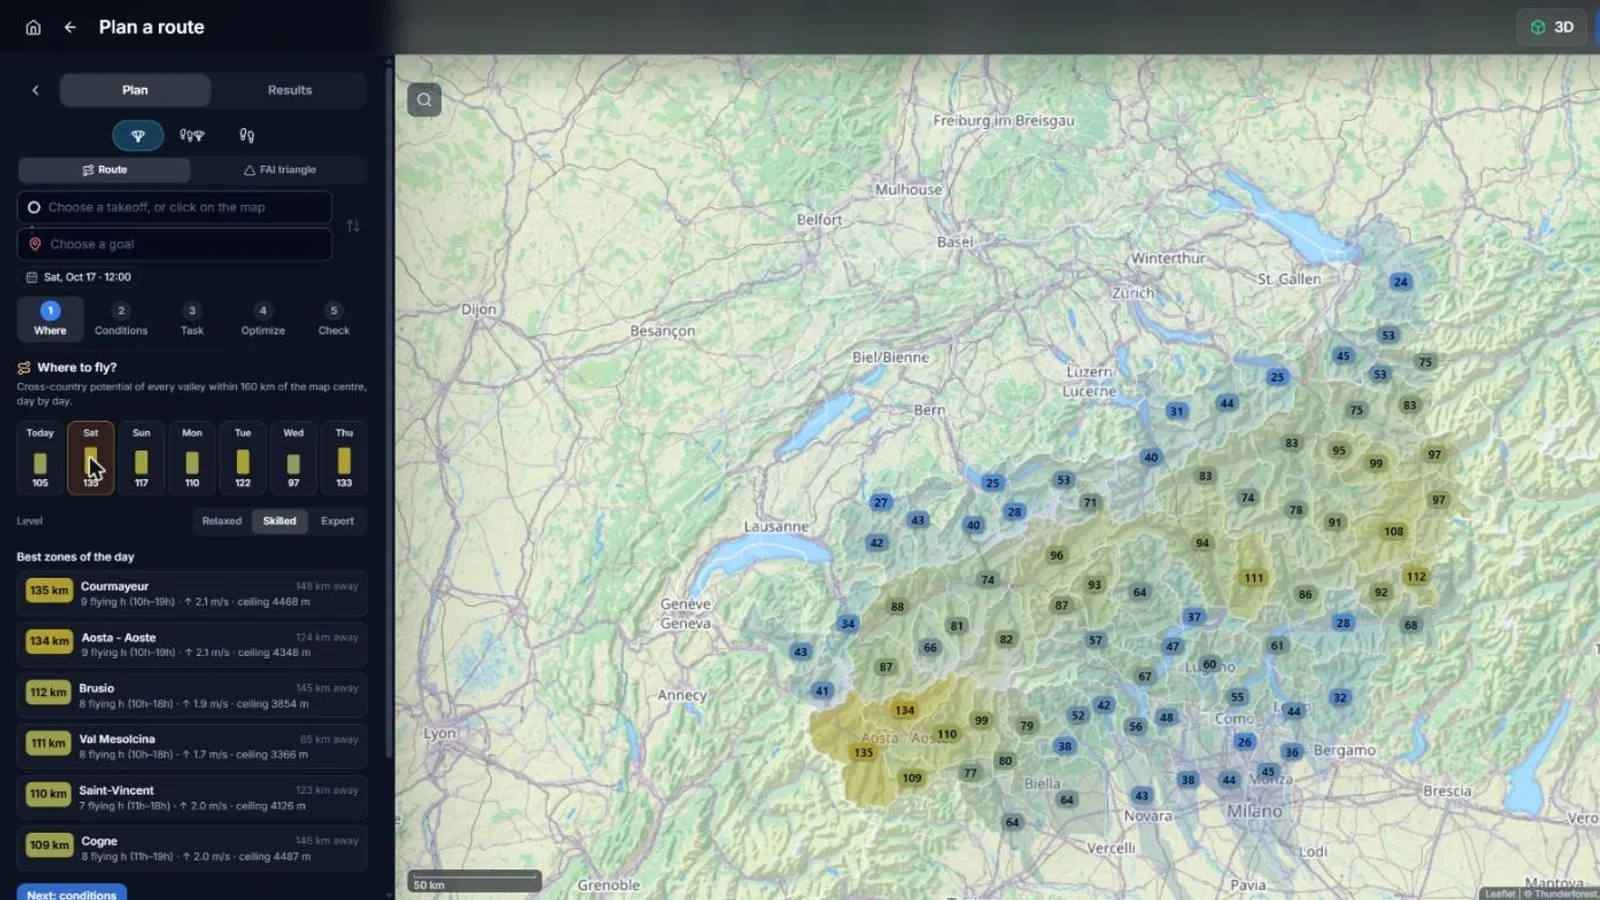
Open the Route Planner: the first tab, When & where, shows the next seven days with the forecast at your takeoff and the best cross-country distance around you.
Choose your level (relaxed, skilled, expert) and your glider: the distances follow them.
- 2
Compare the valleys
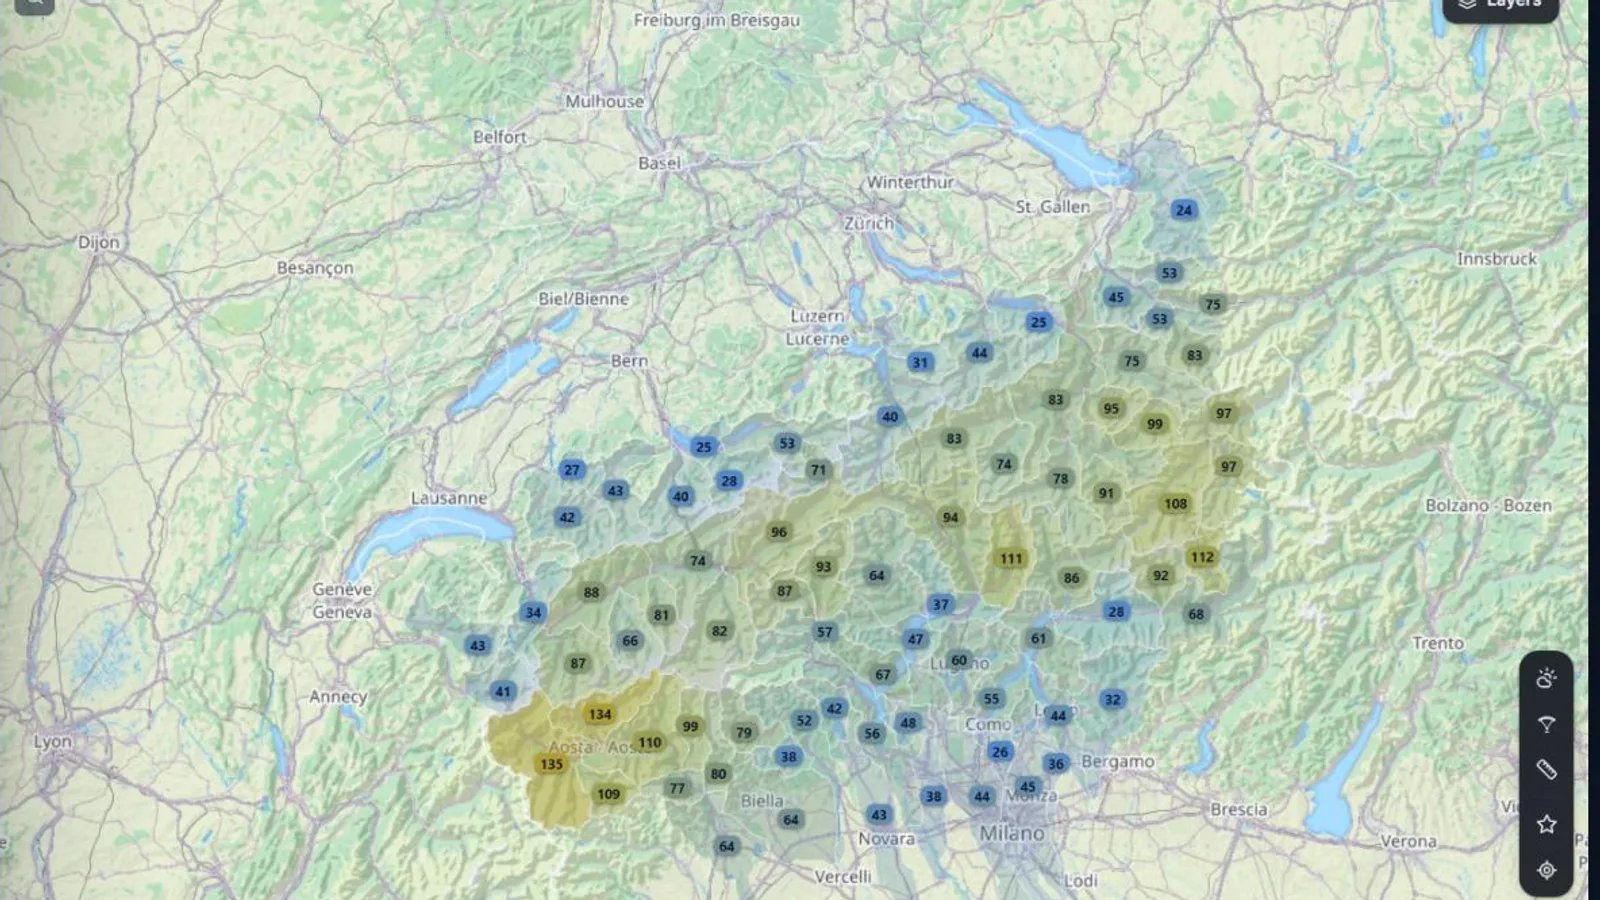
The map colours every valley by its open-distance potential for the day. The list ranks the best zones with their flyable window, climbs and ceiling.
Warnings show strong wind, rain or thunderstorm risk.
- 3
Read a zone
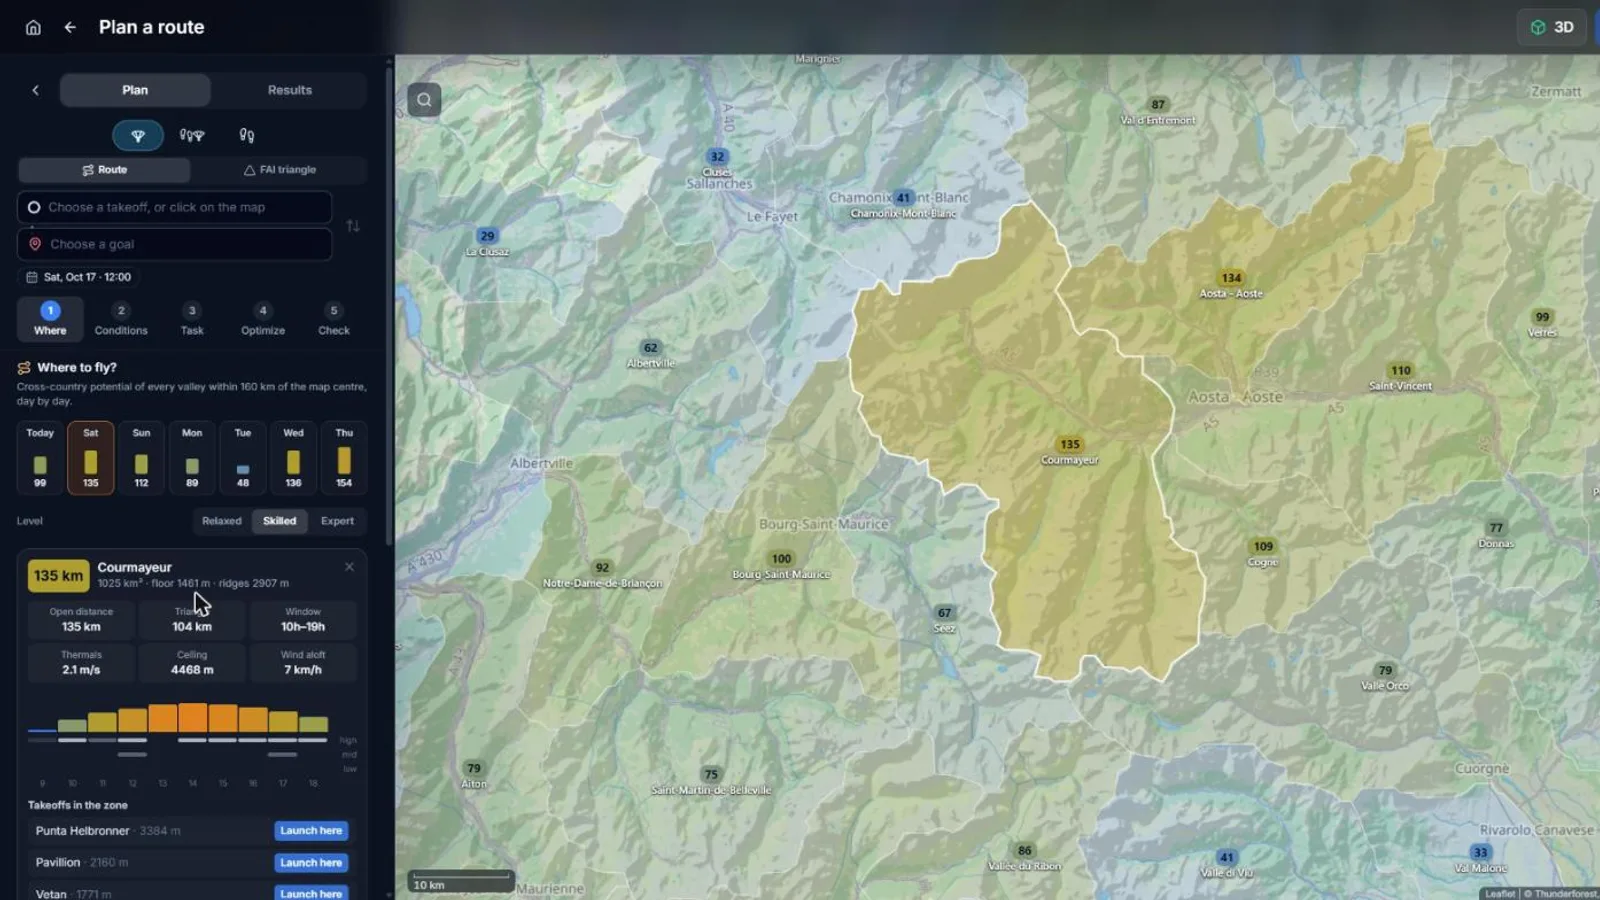
Click a zone: the planner shows its open and triangle distance, the flyable window, the hourly climbs and the low, mid and high cloud under each hour.
A tall bar with grey cloud under it means strong climbs under a thick deck: expect shade and overdevelopment.
- 4
Launch from the zone
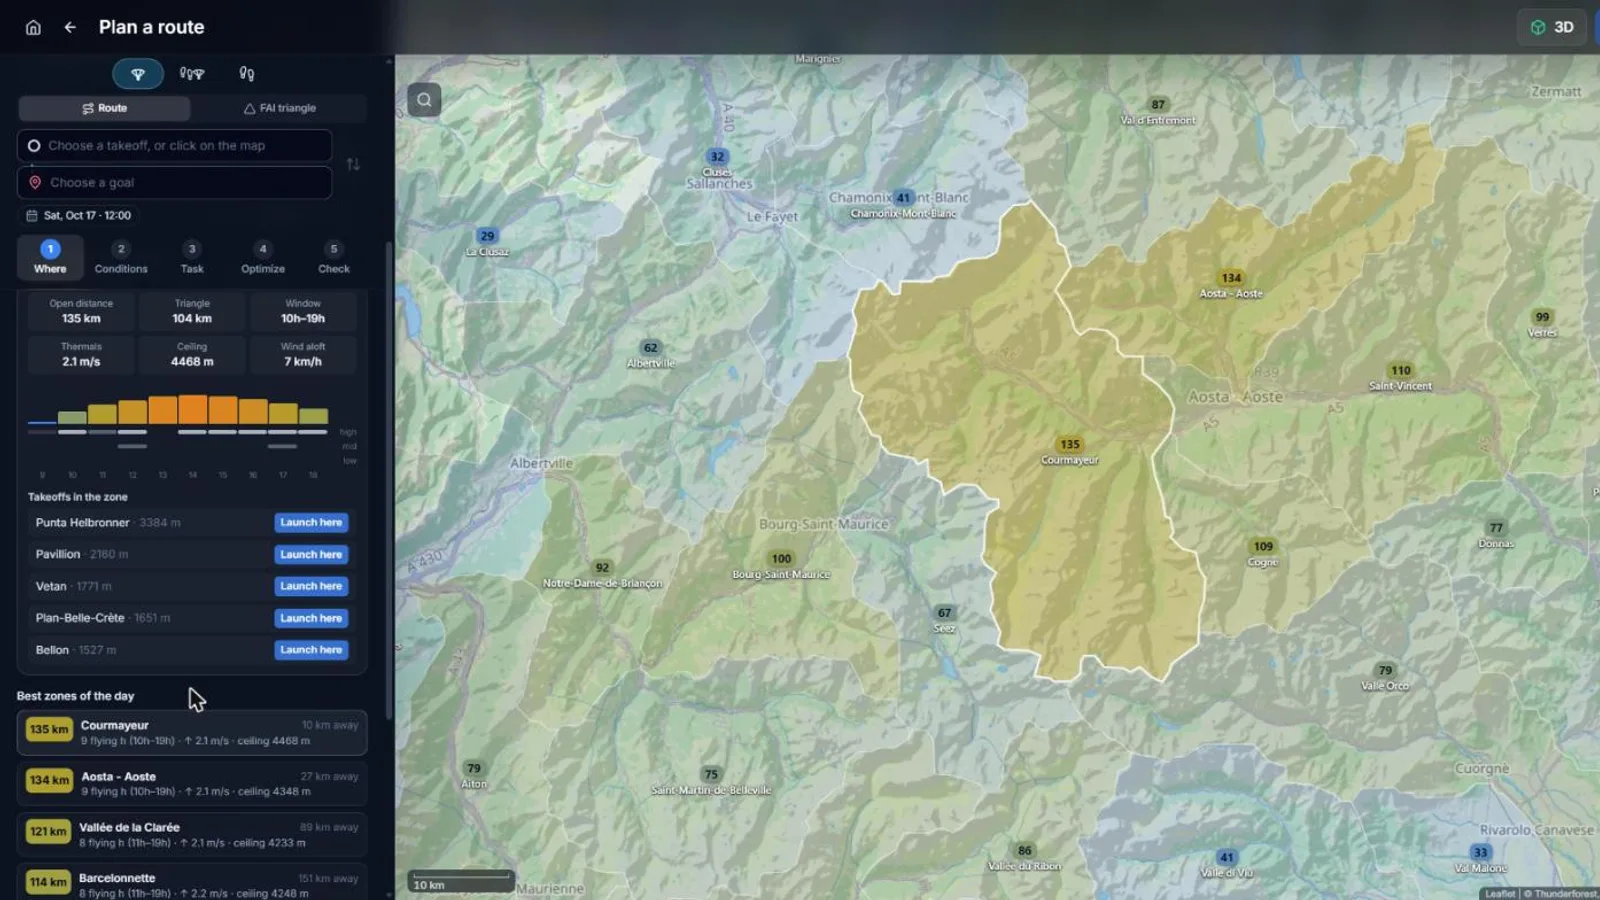
The takeoffs of the zone are listed, highest first. Launch here sets your takeoff and moves on to Conditions, then place your turnpoints and run the optimizer.
Frequently asked questions
How is the distance computed?
Hour by hour, from the forecast at each zone: thermal strength from the sunshine reaching the ground, ceiling and cloud base from the sounding, wind at flying height, rain and storm risk. Each flyable hour becomes cross-country speed with your glider polar (speed-to-fly), reduced by a thin working band, wind and your level.
How reliable is it?
It is built on physics, not guesswork: the same sounding model as our forecasts (thermal strength from the sun reaching the ground, ceiling and cloud base), turned into cross-country speed with your glider polar. We check it on past days against real cross-country flights and keep refining it. It stays a forecast: the potential can be wrong when the weather model is.
Is it free?
Today’s zones are free for everyone. Pro shows the whole week.
Does a high distance mean the day is safe?
No. It is a potential from a forecast, for guidance. Check the official forecast and the conditions on site, and fly within your limits.